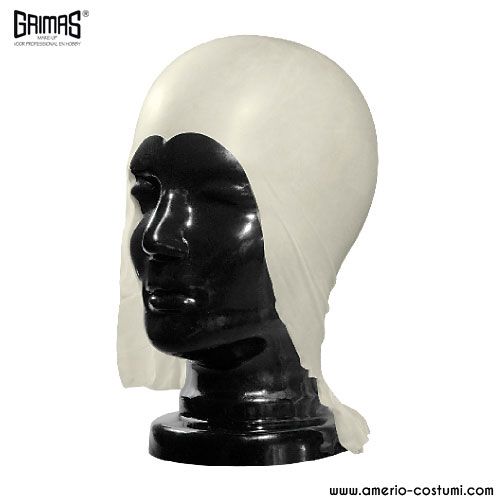
Bald Cap Effect
Grimas Bald Cap is a transparent, elastic plastic cap designed for single-use applications in the film, television, and theatre industries. The Bald Cap is available in one size and sold individually.
Instructions for Use
First, degrease and clean the skin with Grimas Cleansing Lotion. Then dry the skin with a tissue.
Hold the Bald Cap with both hands and stretch it slightly to loosen it for better control. Stand behind the person who will wear it and ask them to hold their thumbs upright with the nails pointing toward the forehead. This allows you to pull the Bald Cap from the front to the back. Ensure the centre point at the front is aligned and leave enough space under the hairline for the adhesive.
Smooth the Bald Cap so it is taut, covering the forehead without wrinkles.
First Adhesion Phase
Lift the front edge of the Bald Cap and apply a 2 cm wide adhesive strip slightly below the hairline using Grimas Mastix Extra. For a natural effect, follow a forehead crease if desired. Extend the adhesive strip to the temples. Reposition the edge on the forehead and press lightly to distribute the glue. Fold back the edge and let it dry for about 15 seconds before pressing it back onto the forehead. Smooth the Bald Cap over the head without wrinkles.
Revealing the Ears
Mark the ears. When refining the edges with acetone, any markings made with the Makeup Pencil will also be removed. When trimming the Bald Cap to size, it should be taut. To prevent tears from tension or cutting, make a small hole by dissolving the Bald Cap at the cutting point.
Proceed as follows: Pull the Bald Cap down diagonally while keeping it taut. Dip a cotton swab in acetone (not too wet) and create a small hole, dissolving the Bald Cap exactly at the desired spot: 2 mm below the upper ear edge where it protrudes from the head.
Tip: You can create multiple holes to ease the cutting process.
Carefully cut the lower edge vertically to the hole. Repeat on the opposite side. Uncover the ears under the Bald Cap.
Similarly, trim the shape of the Bald Cap along the sideburns, leaving enough space for adhesion. The edge can always be retouched later with acetone.
Second Adhesion Phase
Seat the model upright for this step. Create a 2 cm wide adhesive strip along the sideburns, ensuring it connects seamlessly with the first adhesive strip on the forehead. There should be no gaps between the strips. Follow the same process: lift the edge, apply glue, reattach the side edge, press lightly, and lift again. Let it dry for about 15 seconds before pressing the Bald Cap back onto the sideburns.
Next, move to the nape of the neck. To prevent tearing, make a small hole by dissolving the Bald Cap at the cutting point. Fold the Bald Cap backward. Apply a 2 cm wide adhesive strip along the hairline at the neck, extending halfway behind the ears. Stretch the Bald Cap over the back of the head, pulling both sides forward for a taut fit. Open the Bald Cap again by folding it back, let it dry for 15 seconds, and close it firmly.
Refining the Edges
Note: The edges should be refined with cotton swabs soaked in acetone. You will need 15–20 swabs, as acetone dissolves the plastic. Never reuse a swab dipped in acetone.
Take a cotton swab soaked in acetone and create a small hole on the forehead, centred on the adhesive strip. Cut vertically to the hole. Begin refining with acetone from this hole, blending the Bald Cap into the skin for a seamless effect. Proceed as follows: Rub the swab horizontally across the centre of the adhesive strip, dissolving it downward with a vertical motion.
Caution: Work in small sections, staying in the centre of the adhesive strip and following its shape. Create a small hole at the back, centred on the adhesive strip, cut to the hole, and refine the back of the head toward the back of the ears in the same way.
The Bald Cap can be coloured using Grimas Camouflage Makeup Pure or the vibrant colours of Crème Makeup Pure. Use a spatula or stick with a clean, dry Makeup Sponge to apply Camouflage Makeup Pure, spreading and blending it from the centre of the Bald Cap toward the edge. Optionally blend it into the face makeup.
Finish by applying Grimas Transparent Powder, Setting Powder, Makeup Powder, or Colour Powder to mattify and set the makeup.
Removing the Bald Cap
Loosen the adhesive edge with a cotton swab soaked in Grimas Mastix Remover. Remove glue and makeup residues with Mastix Remover. Cleanse the skin with Grimas Multi Remover Pure or Cleansing Cream, then wipe with a tissue. Finally, clean the skin with Grimas Cleansing Lotion.